
If you want a bio page in the next five minutes, this is the whole path: create the page in the Bio pages section of the Elido dashboard, add links, style the theme, tick Published, and paste the public URL into your social profiles. Each step below follows the real editor, field by field, including what it does not do yet. For what to put on the page and in what order, read bio pages for creators. This post only covers the building, and I'll say plainly where the editor is thinner than competitors.
Before you start
You need an Elido account and three things on hand:
- A short list of destinations. Four to six is plenty; each one needs a full URL starting with
https://. - An avatar image: PNG, JPEG or WEBP, up to 1024 KB, or a URL to one that is already online.
- A handle you are happy to keep. It becomes part of the public address, and the create form accepts 3 to 32 characters from a-z, 0-9, hyphen and the _ sign.
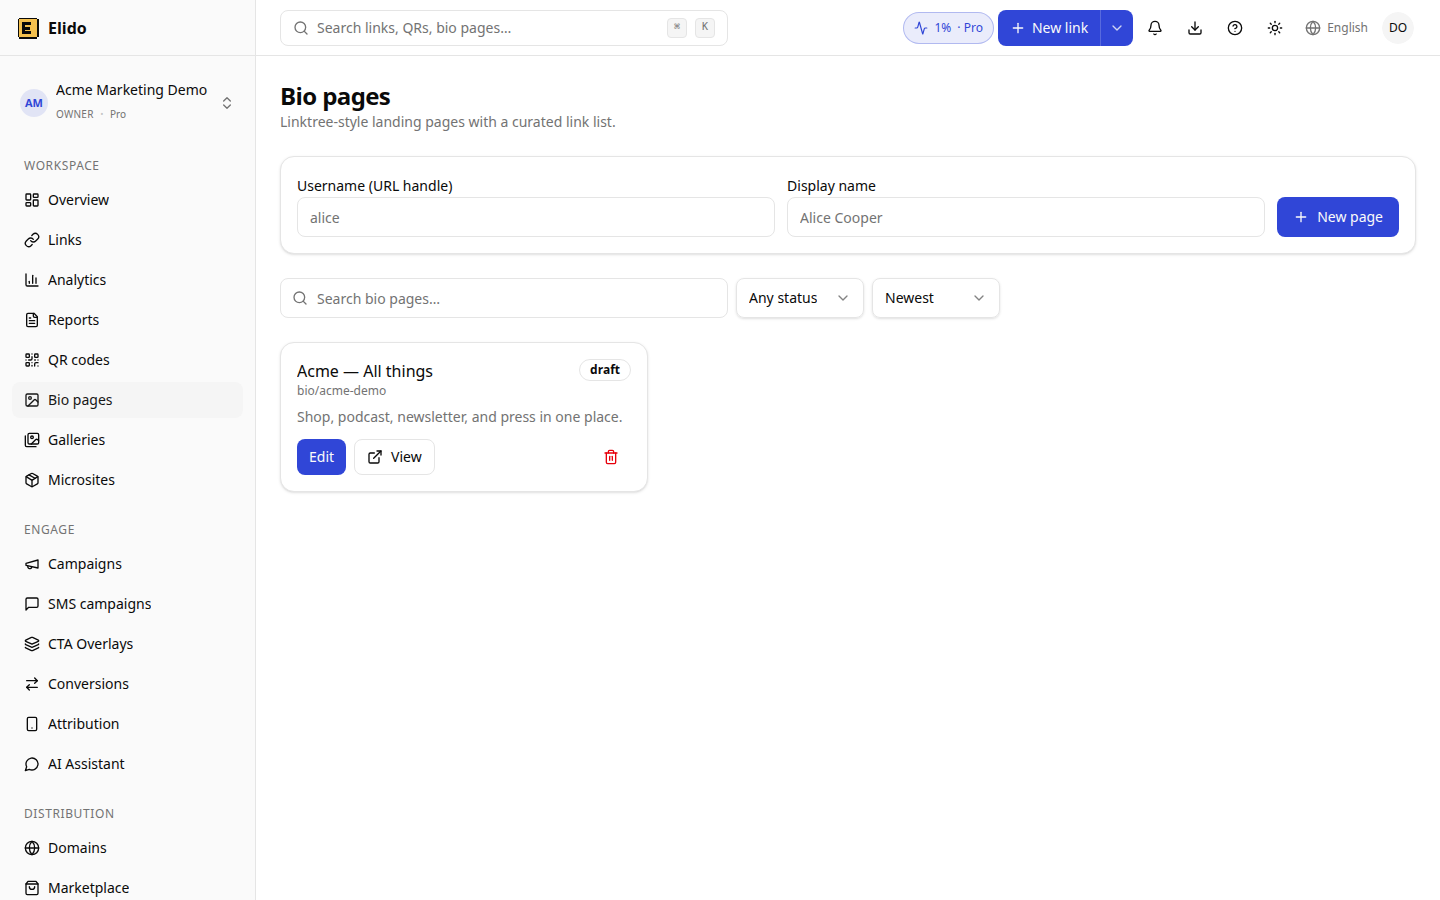
Bio pages sit in the dashboard sidebar under Workspace, between QR codes and Galleries. Opening the section shows your existing pages, each with a live or draft badge.
Step 1: create the page
At the top of the Bio pages screen there is a small form with two required fields: Username (URL handle) and Display name. Type alice and Alice Cooper, for example, and click New page.
If the handle breaks the rules, the form tells you the allowed length and characters. Uppercase is rejected, so pick the lowercase form. Handles are unique, so a taken one returns an error from the server; choose another. After a successful create, Elido opens the editor for the new page.
Step 2: fill in the profile
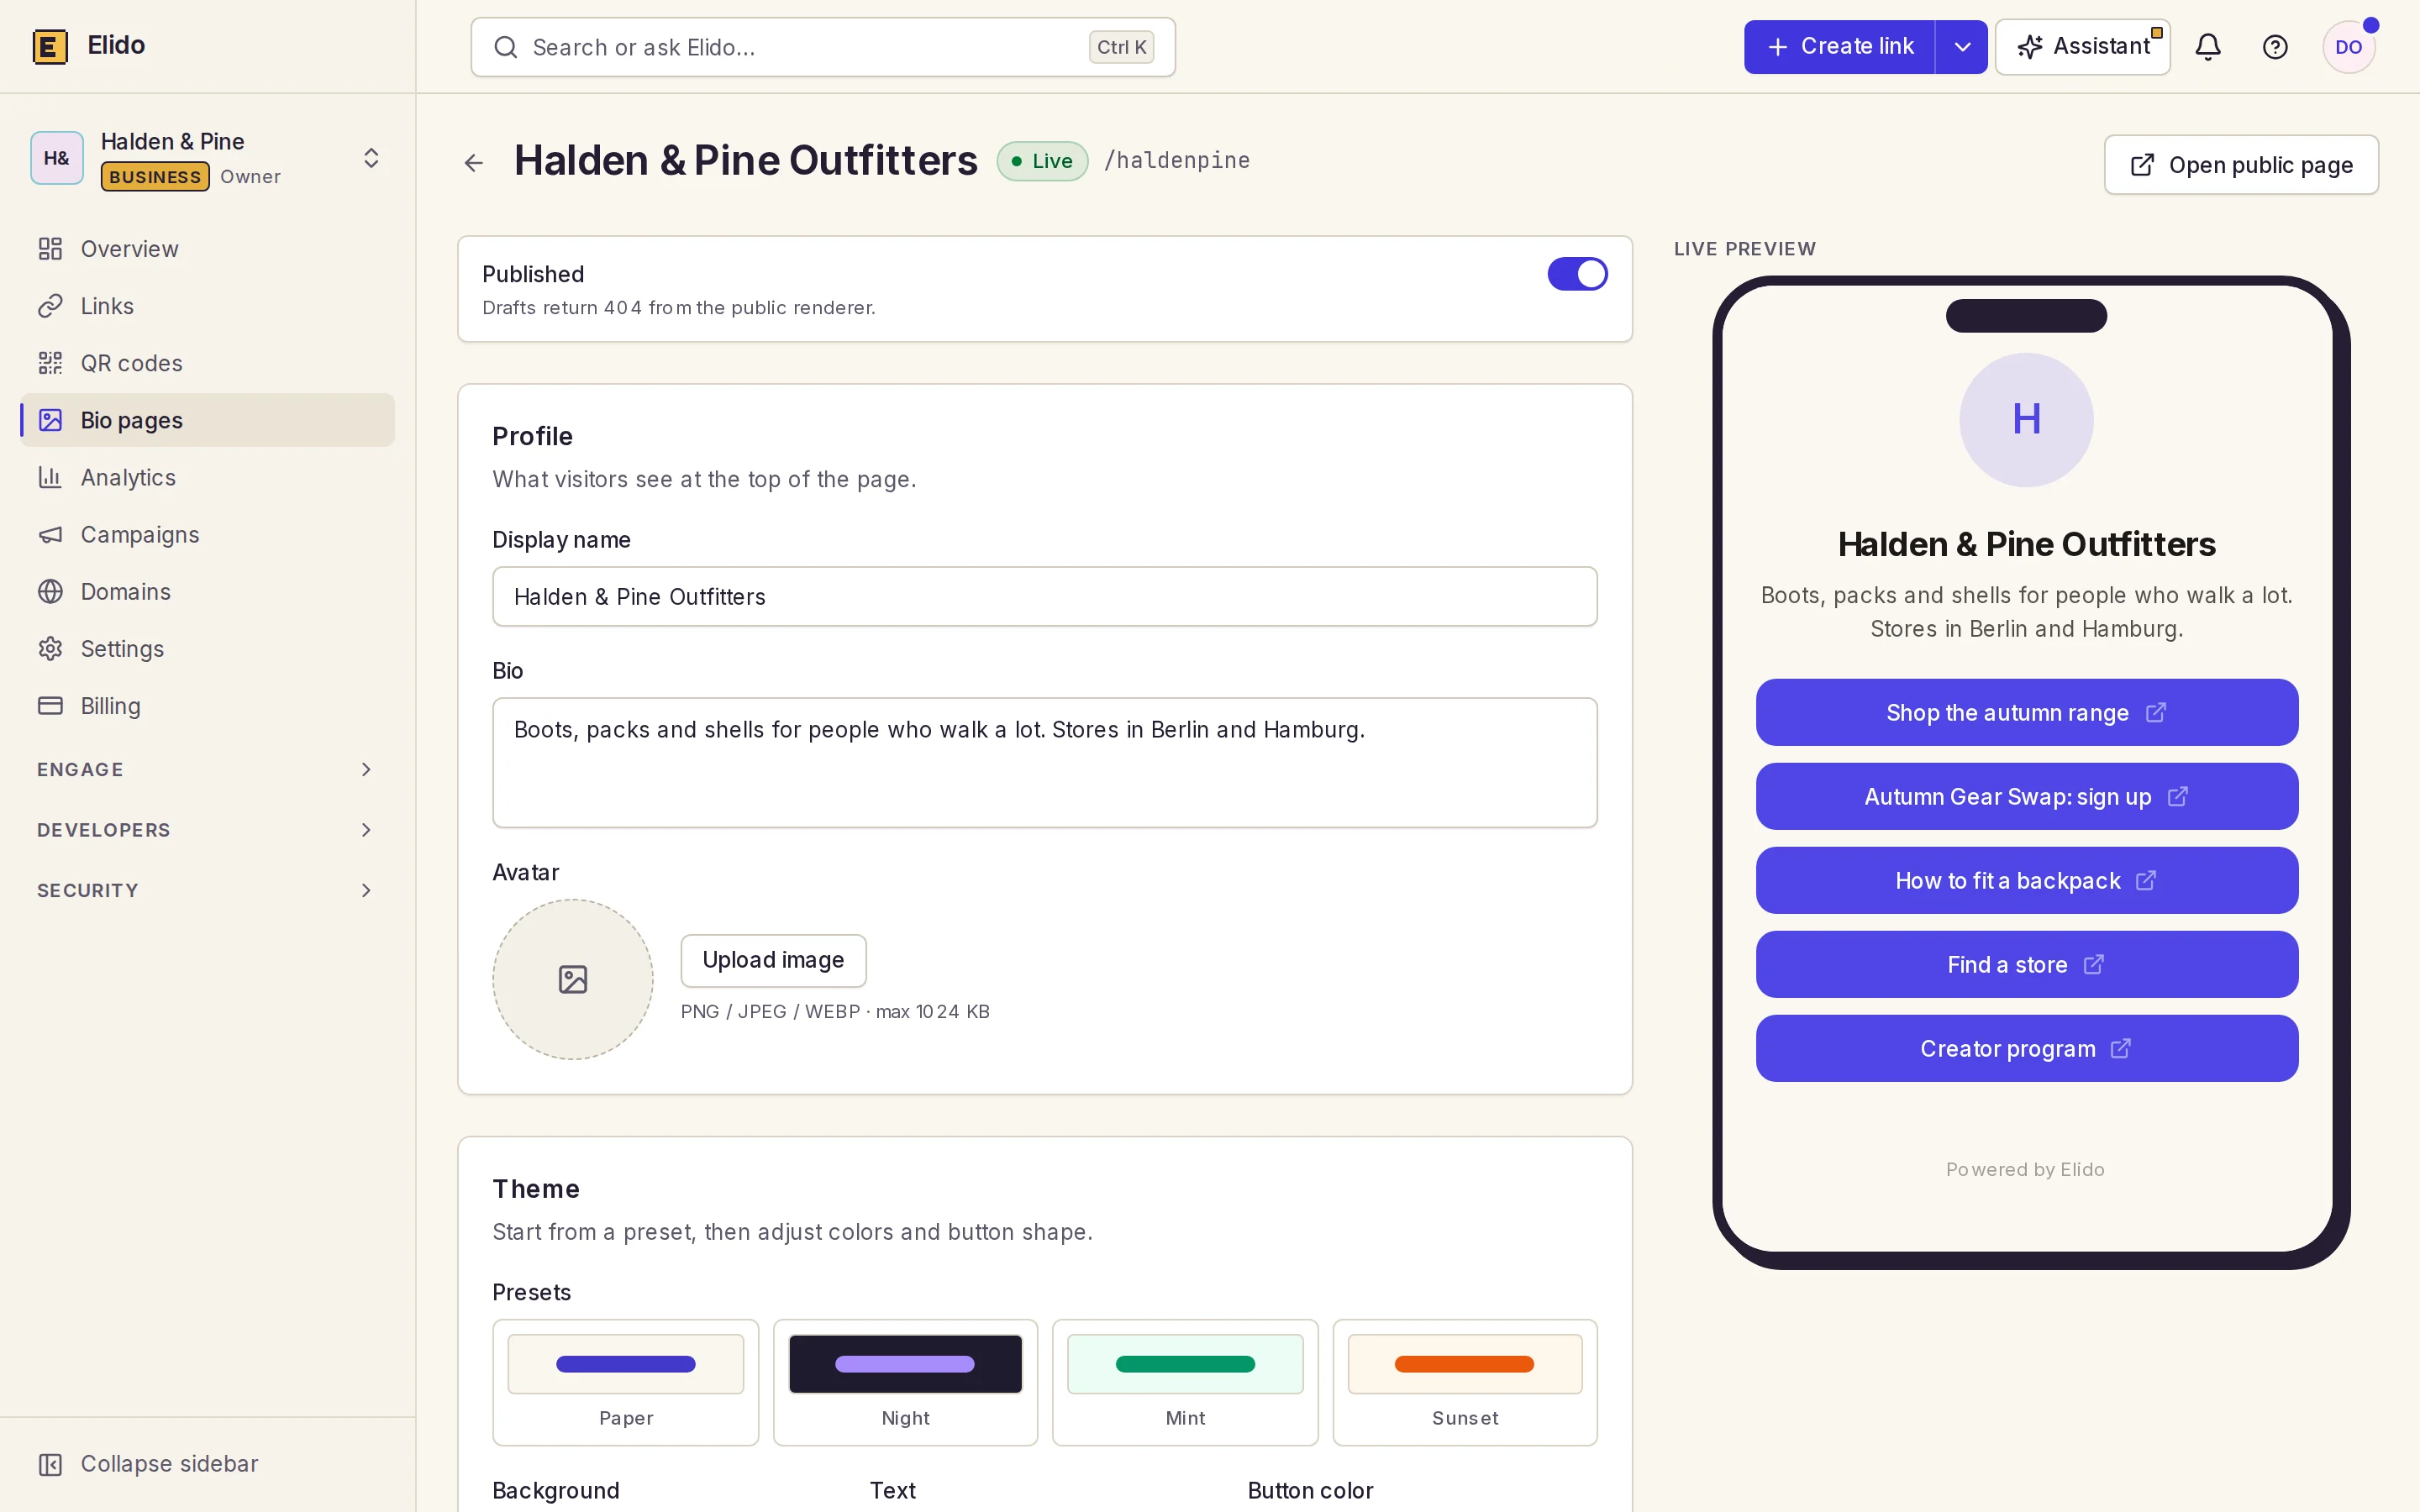
The editor has two columns. The left card is Page settings, the right side holds the links and the click counts. In Page settings:
- Display name is the heading on the public page.
- Bio is the short line under it. The public page also uses it as the meta description, so write one plain sentence.
- Avatar URL takes an HTTPS link, or click Upload to send a file. The hint under the field states the limit: PNG, JPEG or WEBP, max 1024 KB. The page shows it as a 96-pixel circle, so a square image around 400 by 400 pixels is plenty.
Nothing is saved until you click Save changes, and the button briefly reads Saved when it works.
Step 3: add your links
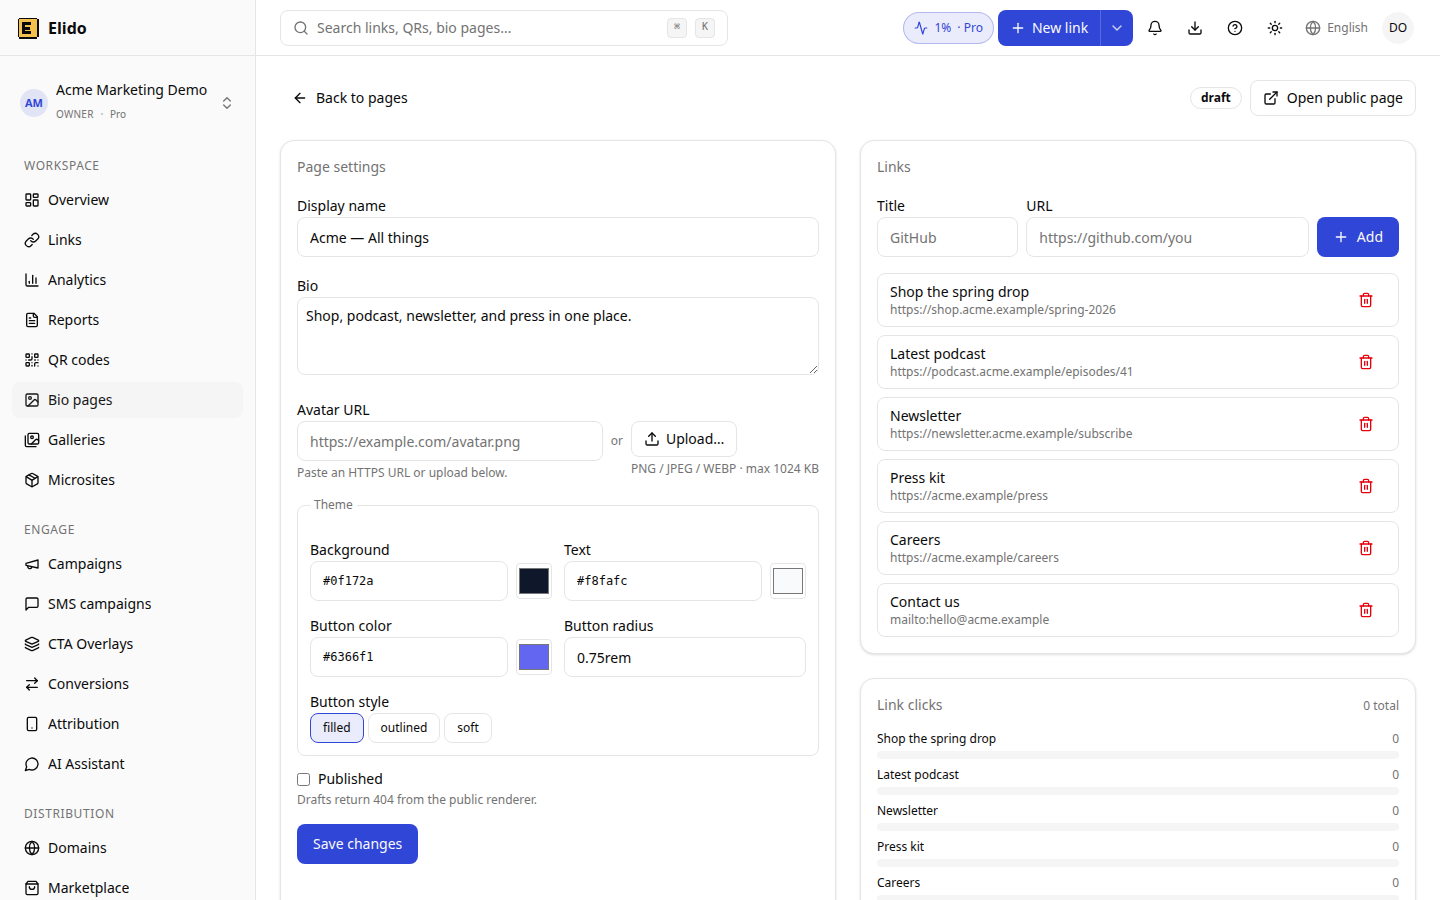
The Links card has a Title field, a URL field and an Add button. Type the label visitors will read, paste the full destination, click Add, and the link drops into the list below with its URL in small print. The URL field is validated, so a value without a scheme is rejected with "url must be a valid URL". mailto: works, which is handy for a contact button.
Plain links are not the only option. The Add block menu in the Links card adds image cards, products with a price, YouTube or Vimeo videos, a newsletter signup that collects email addresses, a row of social icons, section headings, text and dividers. This tutorial sticks to links, because they are what most pages need first.
Three details that save you a rework:
- Links render in the order you add them. There is no drag handle in the editor today, so decide the order first. To move one, delete it with the red bin icon and add it again.
- Each link is just a title and a URL. Per-link icons, subtitles and expiry dates are not in the editor, so don't plan a page around them. I'd call the missing reorder handle the most annoying gap.
- UTM tags are part of the URL. Paste
https://shop.example/spring?utm_source=bio&utm_medium=instagramand the destination's analytics will see the source. The UTM tracking guide explains a naming scheme that stays consistent.
Step 4: style the theme
The Page theme card controls how the public page looks, with a live preview you can switch between phone and desktop size:
| Control | What it sets |
|---|---|
| Theme | A starting preset: Paper, Night, Photo, Studio, Sunset, Aurora, Mint or Terminal |
| Background | A flat colour, a two-colour gradient with an angle, or your own image |
| Colors | Text colour and an accent colour for buttons, links and focus outlines |
| Buttons | Style (filled, outline, soft, glass or hard) and corners (square to pill) |
| Font | One of six heading-and-body pairs, from Modern to Mono |
Pick a preset first, then change anything in it; the card tells you which preset your custom colours started from and lets you reset to it. A background image takes JPEG, PNG or WebP, at least 1200 px wide and up to 5 MB, and an overlay slider darkens or lightens it so the text stays readable. You do not choose the text colour on buttons: the editor picks it so it reads. A readability check runs six contrast tests, and when a colour you picked falls short, the public page shows the nearest colour that passes. That cannot be switched off, which I count as a feature. I still look at the page on a real phone before saving.
Step 5: publish and share the URL
A new page is a draft. Tick Published, read the hint under it ("Drafts return 404 from the public renderer"), and click Save changes. The badge at the top changes from draft to live, and Open public page takes you to the real URL.
On the hosted renderer the address is bio.elido.app/your-username. Open it in a private window and on your phone, then check that every button goes where you expect. Public pages are cached for about a minute, so an edit can take that long to show up.
Bio pages do not support a custom domain today; that is a gap, and it's why the old advice about CNAME records does not apply here. If a branded address is the priority, galleries can be bound to a custom domain, and the custom domains walkthrough covers the DNS side. If you only want a branded short address, point a short link on your own domain at the bio page URL.
Then paste the URL into the profile fields you use. The native options differ by platform and change often, so check the field on each app. For Instagram specifically, the Instagram bio link guide covers the native link slots and when a page beats them, and TikTok link in bio and Bluesky link in bio do the same for those two.
Step 6: read the click counts
Back in the editor, the Link clicks card lists every link with a bar and a number, plus a total in the corner. It starts at zero and updates as visitors tap. The bars are scaled against your most-clicked link, so you can see at a glance which button earns its place and which one is dead weight.
What gets recorded for each tap: which link, the visitor's country, device type, browser and the referrer. The public page sends the event when someone taps a link, without blocking the navigation. What the dashboard shows today is the per-link count, not a breakdown by country or hour, and page views without a tap are not counted. If you need channel-level attribution, rely on the UTM parameters from step 3 and read them in the destination's analytics. The short link analytics post covers which numbers deserve attention.
Common problems
- A 404 on the public URL means the page is still a draft, or the username in the URL does not match the handle. Tick Published and save.
- An edit that is not visible yet is usually the cache: public pages are cached for roughly a minute, so reload after waiting.
- If the avatar upload is refused, check the format (PNG, JPEG, WEBP) and keep the file under 1024 KB.
- A rejected link needs a full address with a scheme, for example
https://. A bare domain fails validation. - If you cannot find the Bio pages menu, it is a permissions issue: the section is permission-based. Workspace roles need the bio view permission to see it and create, edit or manage-links permissions to change anything, so ask a workspace owner.
Related on the Blog
- Bio pages for creators: what to put above the fold - the strategy side of the page you just built.
- Link in bio ideas: what to put and how to order it - concrete examples by audience.
- How to add more than one link to your Instagram bio - the native slots versus a page.
- Track UTM campaigns end-to-end without a CDP - naming scheme for the UTM tags in your bio links.
- Short link analytics: what to measure and what to ignore - reading the click data.
- Custom domains for short links - a branded address for the links you create.
The product overview is at /features/bio-pages.
Frequently asked questions
How long does it take to build a link-in-bio page in Elido?
About five minutes if you have your destination URLs and an avatar ready. Creating the page takes two fields, the profile takes a short bio and an image, and each link is a title plus a URL. Styling is optional because the default theme is already readable. The last step is ticking Published and saving.
Where does my Elido bio page live?
On the bio renderer at bio.elido.app, under your username, so a page with the handle alice is served at bio.elido.app/alice. Bio pages do not take a custom domain today. Elido galleries, a related page type that bundles short links, can be attached to a custom domain if a branded address matters to you.
Why does my new bio page return a 404?
A new page starts as a draft, and drafts return 404 from the public renderer on purpose. Open the page in the dashboard, tick Published, and click Save changes. The badge next to Open public page switches from draft to live. The public page can also take up to a minute to refresh after you save.
Can I reorder links or add icons and expiry dates?
Not in the dashboard editor yet. Links appear in the order you add them, and the editor takes only a title and a URL per link. To change the order today, delete the links that need to move and add them again in the order you want. Per-link icons, expiry and reordering by drag are not part of the current editor.
What does the bio page track?
Each tap on a link is recorded with the link, country, device, browser and referrer, and the dashboard shows a click count per link plus a total. It is a ranked list of links, not a time-of-day chart. Page views without a click are not counted separately. Use UTM parameters in your destination URLs for attribution in your own analytics.
Can I use UTM parameters on bio page links?
Yes, by writing them into the URL you paste. The editor has no separate UTM field, so build the full URL first, for example with utm_source=bio and a medium per platform, and paste it as the destination. The destination site's analytics then attributes the visit to the bio page, and Elido still counts the tap itself.
Try Elido
Paste a URL, get a working short link
No signup. Link lives for 30 days. Sign up to keep it forever.
Free account required. The free plan includes 25 links in total. Already have an account? Log in