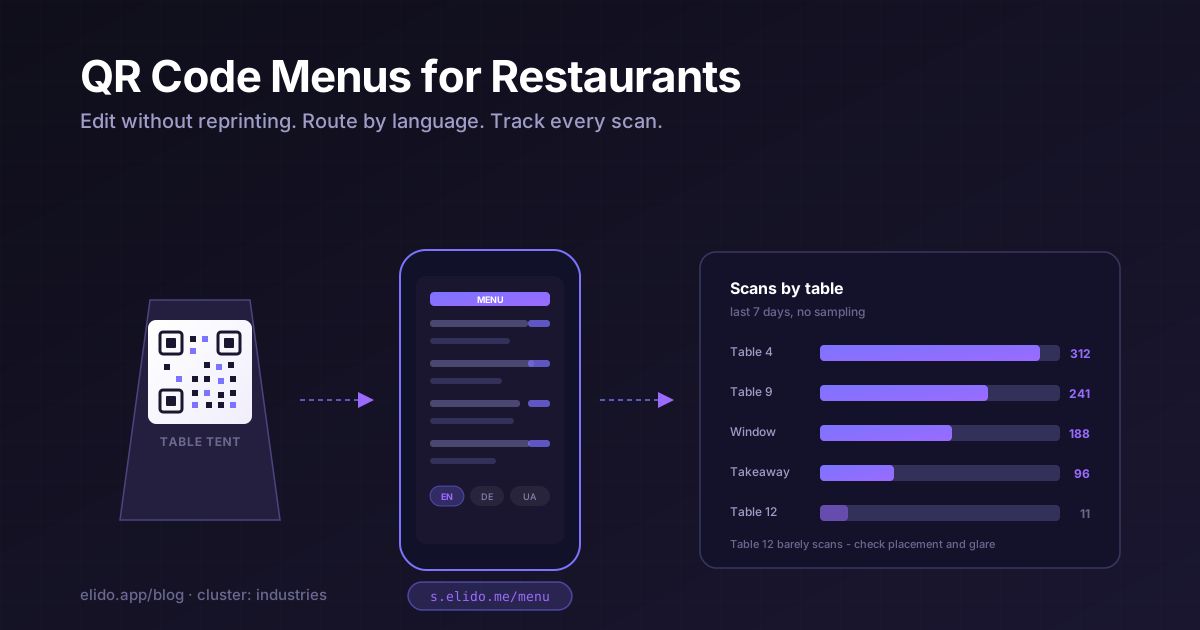
A QR code menu works best when the code on the table encodes a short, editable link instead of the menu address itself. Then you can fix a price at 5 p.m. without reprinting anything, give every table its own scan count, and swap the menu file when the season changes. Guests see an ordinary QR code; you get a control point behind it.
This guide is written for the person who actually runs the room: how to choose dynamic over static, set up one code per table, handle PDF versus web menus, size and place the code, plan for dead-signal moments, read the scan numbers honestly, and keep privacy simple. It covers a digital menu QR code from the first link to the first month of data.
Dynamic or Static: Which QR Code Menu to Print
Use a dynamic code for any menu you expect to change. A static code stores the menu's web address directly in the pattern, so the destination is frozen the moment it is printed. A dynamic code stores a short link. You decide where it points. The full mechanics are in dynamic vs static QR codes.
Here is how the choice plays out for a restaurant.
| Situation | Static code | Dynamic code |
|---|---|---|
| Price or dish changes | New print for every table | Edit the destination once |
| Menu moves to a new host or file | Every printed code breaks | Repoint the link, codes keep working |
| Scan counts by table | Not available | One link per table, counted separately |
| Link-in-code density | Long address, denser grid | Short link, sparser grid that scans from further away |
Static only makes sense for a menu address that will never move and a restaurant that does not care about scan data. Rare. In my view, a static menu code is a false economy. If you already printed static codes, the honest fix is one more print run with dynamic ones; the old ones cannot be edited.
One side benefit people miss: a short link makes a smaller, cleaner code. A shorter payload needs fewer modules, so the squares are larger at the same printed width, which helps older phones. Error correction levels explains the density trade-off in detail.
Per-Table Codes and Menu Updates
One link per table gives you counts by table, and editing the link's destination changes the menu everywhere at once. Both rest on the same short-link layer.
One code per table
Give each table, or each zone, its own short link, and point all of them at the same menu. The printed codes look identical in style but count separately. That is the whole trick behind a table QR code with scan counts.
A worked example, with invented numbers: a 20-table restaurant creates links named menu-t01 to menu-t20, all pointing at the same menu page. Elido's links dialog has a bulk tab where each line is a destination, a custom slug, and an optional title, so twenty links take one paste. Then each link gets a QR code from the designer. After two weeks, the owner compares tables and sees that the corner tables 17 and 18 have almost no scans. The menu is fine. The cause is placement. Tents behind a planter.
Two naming habits save you later. Put the location first for chains (fra-menu-t01), and put a tag on every link for the placement type (table, window, takeaway) so you can filter in the dashboard. If your link layout has more than a handful of codes, label them in the title field with the physical spot, because six months from now menu-t07 will not tell you which room it was in.
Skip one code per guest or per visit; table or zone is the right grain.
Updating the menu without reprinting
Edit the destination of the short link and every printed code points to the new menu on the next scan. In Elido you edit the link's destination URL, and the printed pattern never changes.
Three routine cases:
- Price or item edit. Change the page the link points to. If the menu page is a normal web page, nothing else is needed.
- Seasonal menu. Create the new menu page, then repoint the link on the changeover day.
- Replacing the menu host. Repoint the link. Static codes die here. The old address stops working and every tent is scrap.
After each edit, scan one printed code on a phone that is not on your Wi-Fi to catch typos before service.
PDF Menu or Web Page Menu
A mobile web page beats a PDF for most restaurants, but a PDF is a legitimate way to launch today. The page wins on text size, load weight, and screen readers. The PDF wins on speed to launch and on keeping the designed look of your printed menu.
- Dynamic code to a PDF: launch this week with an existing designed menu. Watch pinch-zoom reading, file size, and PDFs that are just a photo of a menu.
- Dynamic code to a web page: menus that change often or come in several languages. You need a page built for phones.
- Static code to either: nothing a restaurant needs, because any change forces a reprint.
If you go with a PDF, keep it light enough to open on a weak connection, use real text rather than a scanned image, and host it at a stable address. QR code for a PDF covers hosting and the static-versus-dynamic choice for documents. Move from PDF to a web page later. No tent changes.
Size, Contrast, and Placement on the Table
Size the code to the distance, keep strong contrast, and leave a clear margin. Rule of thumb: one tenth of the scanning distance. A table tent read from about 30 cm wants roughly 3 cm; go to 4 or 5 cm in a dim room. How big should a QR code be has the sizes by use case.
- Contrast beats colour. Dark modules on a light plain background scan best. Pale on pale fails first in dim light. The W3C's contrast guidance is written for text, but the same instinct applies to your code.
- Keep the margin. The code's maker, Denso Wave, notes that a margin is required around a QR code. Do not run text or a border up to the edge.
- Mind glare. Glossy laminate under downlights bounces light into the camera. Matte or satin laminate scans far more forgivingly.
- Use error correction on rough surfaces. A table tent gets splashed and scuffed. Level Q or H gives room to survive that.
- Print a vector. Export SVG so the printer scales the code with crisp edges. Elido's QR designer exports both SVG and PNG.
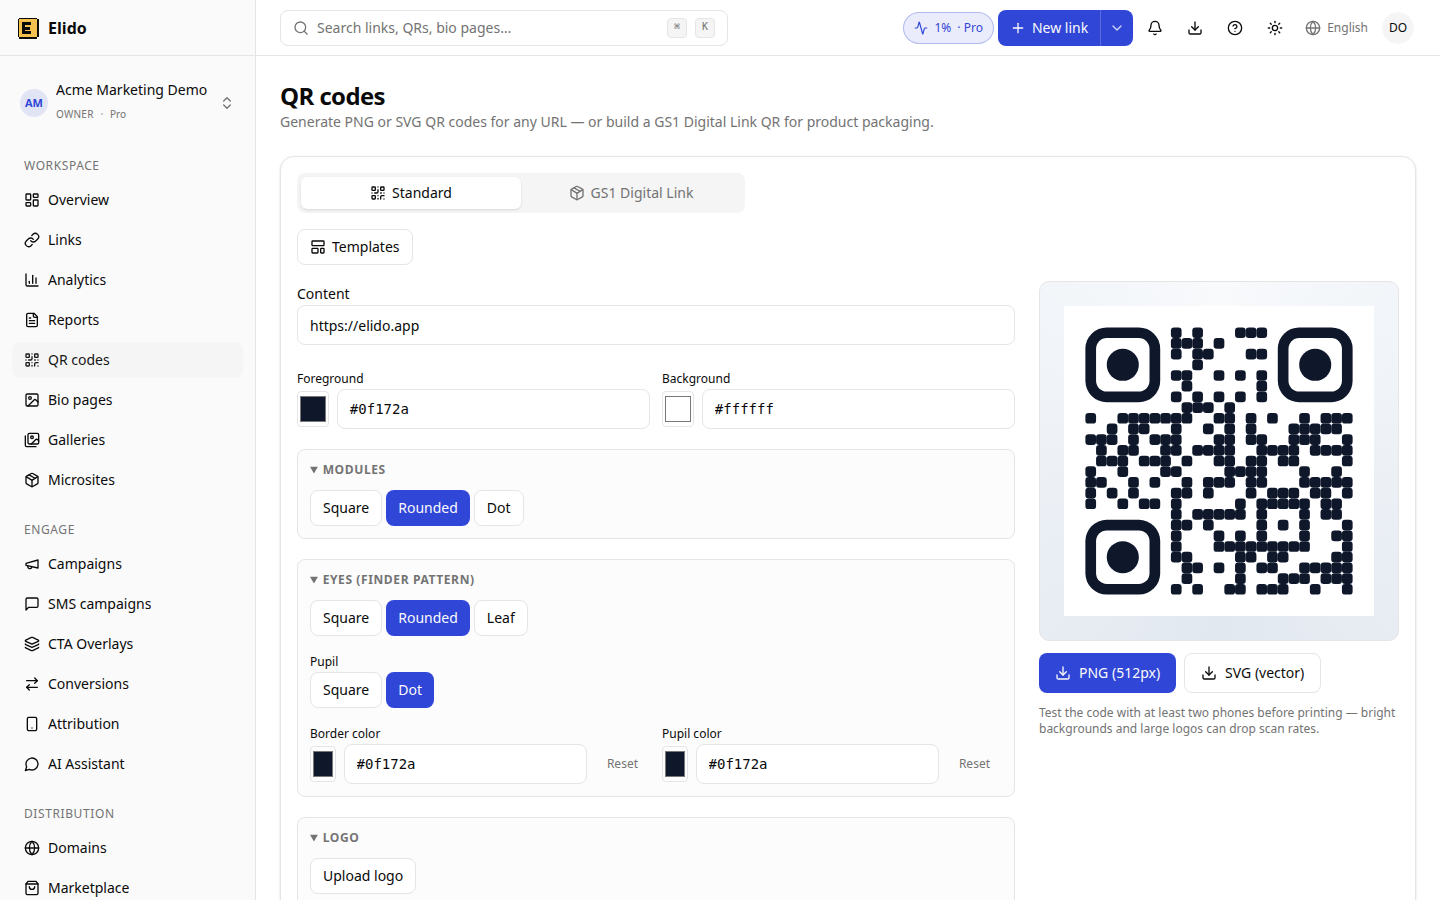
The QR designer in a DEMO workspace. The content field shows a placeholder address, not a real restaurant.
I would spend the most time on placement. Put the code where a seated guest can reach it without leaning. A tent at about eye level, angled toward the chairs, beats a flat sticker under a lamp. Glare kills scans. Always print one test card, laminate it as planned, and scan it from a seated position on three or four phones, including an older one, before you order the batch.
Want the whole set generated and printed as a batch? Create your first QR menu link and design the codes in the QR designer.
When There Is No Signal
A QR code menu needs the guest's phone to load the link, so it fails when there is no data and no Wi-Fi. No offline scans. Both the redirect and the page come over the network. Plan for that rather than hoping.
- Post the guest Wi-Fi. A small card by the code with the network name and password turns a dead-signal basement into a working one.
- Keep printed menus on request. Staff offer one without making it awkward. This also covers guests who have no smartphone, a cracked camera, or low vision.
- Print a short typed address. If the scan fails, a guest can type it. A short link is easy to type; a long one is not.
- Keep the menu page light. A page that is mostly text and small images loads on a weak signal. A 20 MB PDF does not.
- Check your own room. Walk to the worst seat and try the scan on mobile data, not Wi-Fi.
For the wider accessibility picture, see QR code accessibility. Treat the fallback as part of the menu. It is not an apology.
What Scan Counts Tell You, and What They Do Not
Scan counts tell you about menu attention, not sales. In Elido, each scan is a click on the short link, and the link's analytics show clicks over time, countries, devices, and browsers. With one link per table you can compare tables, zones, and placements.
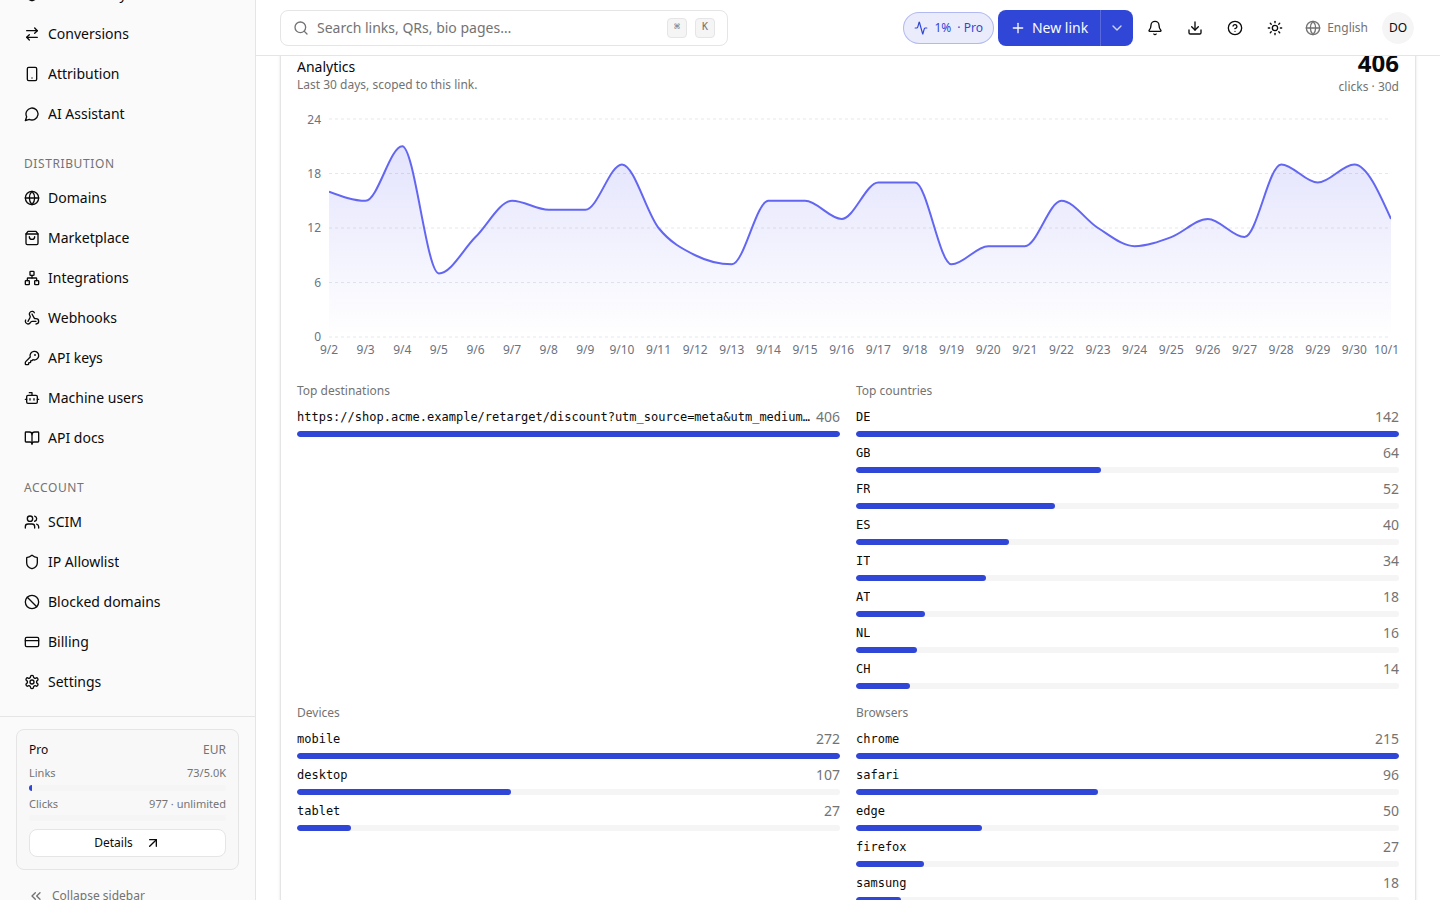
Analytics for one link in a DEMO workspace. These numbers are synthetic example data, not a restaurant's results.
What the numbers can answer:
- Which tables, windows, or takeaway placements get scanned and which are ignored.
- Whether the new tent design or position changed anything, by comparing before and after on the same link.
- The device mix of your guests, which tells you how much to care about older-phone legibility.
What they cannot answer:
- Orders. A scan is not an order.
- People. The same guest may scan twice, and staff test scans are counted too.
- Why. A quiet table might be a bad spot or a quiet table. Move the tent, then compare.
Use scans for placement, and your till for sales. building a QR code campaign from scratch shows how to tag and compare placements.
Language Routing and Privacy
One code can serve several languages: Elido's link targeting rules can match on the visitor's language, country, or device, with a default when nothing matches. A restaurant in a tourist area can send German-language phones to a German menu and everyone else to English. Keep it to one or two rules. See smart links explained and geo-targeting short links.
On privacy, a scan produces a click record with technical details such as approximate location and device type, and the guest does not have to create an account to read a menu. What you owe in notices and retention depends on your jurisdiction and your own setup, so read QR codes and GDPR and check with your own advisor rather than relying on a blog post for the rule. Tracking on the menu page itself is a separate decision.
A One-Afternoon Setup Checklist
- Put the menu at a stable address that reads well on a phone.
- Create a dynamic short link per table or zone, all pointing at the menu.
- Add language rules only if you have a second menu worth routing to.
- Generate each code from its short link, high error correction, dark on light, export as SVG.
- Print one test card on real stock. Scan it seated, on several phones.
- Order the batch on matte laminate, with the typed address and Wi-Fi card.
- After two weeks, move any tent with near-zero scans.
For the generator and routing features, see QR codes and smart links, and the analytics page for what each link reports. Plans are on the pricing page. For the wider restaurant picture beyond the table, read URL shorteners for restaurants.
Related on the Blog
- Dynamic vs static QR codes: what actually changes
- QR code for a PDF: link any document in minutes
- How big should a QR code be? Size and distance rules
- QR code error correction levels: L, M, Q, H explained
- QR codes and GDPR: what a scan collects and what you owe
- URL shorteners for restaurants: QR menus that actually convert
Frequently asked questions
How do I make a QR code menu for my restaurant?
Put your menu at a stable web address, create a dynamic short link that points to it, then generate the QR code from the short link. Print it dark on light at 3 cm or larger with a clear margin, and test the printed card on a few phones before you order a batch.
Should a restaurant QR code be dynamic or static?
Dynamic, in almost every case. A dynamic code encodes a short link whose destination you can edit, so prices and dishes change without a reprint, and each scan is counted. A static code encodes the menu address itself, so any change means new print and you get no scan data.
Can I change the menu without reprinting the QR code?
Yes, if the code is dynamic. The printed pattern holds the short link, and you edit the destination behind it in the dashboard. Every table tent keeps working and shows the new menu on the next scan.
How do I track scans for each table?
Create one short link per table, all pointing to the same menu, and generate one QR code per link. Each link has its own analytics, so you can compare tables, zones, and placements. Scans measure interest in the menu, not orders or guests.
Is a PDF or a web page better for a QR code menu?
A mobile web page is better for most restaurants because text reflows, loads smaller, and can be read by a screen reader. A PDF is fine when you already have a designed menu and need to launch today, as long as it is small and the link is dynamic so you can swap the file.
What if guests have no signal or no smartphone?
Keep printed menus available on request, print a short typed address beside the code, and post the guest Wi-Fi name where guests can see it. A QR menu should be an option, not the only way to read the menu.
Try Elido
Paste a URL, get a working short link
No signup. Link lives for 30 days. Sign up to keep it forever.
Free, no signup required · 2 per day